| Happy | ||||
|
|
|
 |
|
|
| Merry Christmas and Happy New
Year! Kim and Donna thank you for supporting KD Craft Concepts these past few months. We are looking forward to bringing you some great inspiration and products in 2012! | ||||
Saturday, December 24, 2011
Merry Christmas!
Saturday, October 22, 2011
Open House Sunday, October 23rd from 12-4PM!
I'm hosting my first open house on Sunday, October 23rd from 12-4PM. Stop on by my home and see my all new studio! Sit down, make a little art and enjoy some refreshments!
 The first 3 people in the door will receive a door prize!
I'll have some catalogs available if you feel like you need some supplies and I do have a small store for you to peruse as well.
I'd love to see you! Be sure to stop on by and say Hi!
284 Beulah St
Whitman, MA
I'll have some catalogs available if you feel like you need some supplies and I do have a small store for you to peruse as well.
I'd love to see you! Be sure to stop on by and say Hi!
284 Beulah St
Whitman, MA
Wednesday, October 19, 2011
eBay...
Has anyone out there ever eBayed before? It's hard work, huh!
I've got several items that I've been meaning to get rid of for months and with the restructuring of my craft room and the children's room I just need to make space. Never mind not having a regular paying job this last month as well. I've given away a bunch of stuff, thrown away broken things and donated a majority if books and clothing but there is some craft type supplies I decided would be best suited to eBay. I even have a few things I might put up on Etsy but that's a different adventure, I'm sure.
So I listed some basket weaving items and some stamping items up on eBay. First, let me say.... It takes about 15 minutes to list each item. That doesn't count answering questions, packaging and mailing.
Then the fees involved are huge! 9% from eBay and the another 2.9%+.10 for Paypal. eBay even takes fee from your shipping. So I already know I'm going to have to cut into any profits just to pay the shipping to get these items to their new home. Ugh!
Really, I'm wondering if it would have been easier to give the stuff away. Or throw it away. I don't want to - goodness knows I never get anything for free and I don't want to pollute the world anymore than it already is. But if I end up paying someone to take the stuff off my hands, what good is that to me either?
If you are interested in any of my eBay items, you can look up my eBay name at zinfodel. Or try clicking here to get to one of my current auctions:
Browser URL:
http://item.mobileweb.ebay.com/viewitem?itemId=170713838364
Lot Of Close To My Heart Ink Pads
My only hope now is that something goes for big money. Who knows, maybe I'll get lucky...
Saturday, October 15, 2011
Copic class in November
I'm working on my November 10th Copic class. We will be working on reds and some faces. Here's a sneak peek of the techniques we'll be working on in class.
Don't worry, it will be a card. This one was just colored. Whether you are a beginner or a regular Copic user, this class is for you!
You can sign up for class via PayPal or by contacting me directly! See this link to pay via Paypal. http://www.kimparkinson.com/Class_Information.html
Don't worry, it will be a card. This one was just colored. Whether you are a beginner or a regular Copic user, this class is for you!
You can sign up for class via PayPal or by contacting me directly! See this link to pay via Paypal. http://www.kimparkinson.com/Class_Information.html
Sunday, October 9, 2011
Maine
We went on a much needs vacation to Maine this weekend. I feel great, rejuvenated and ready to get started on my next adventure. Here are some photos of our relaxing trip...


Saturday, October 1, 2011
Newsletter sign ups now available!
My website is up and running!
I've got a class calendar, guest book and even a newsletter sign up page!!
I've decided to create a more professional looking newsletter and have signed up for a marketing service. If you would like to know what classes I'll be teaching, where I'll be teaching them and more, please go to http://www.kimparkinson.com/Newsletter_Sign_up.html and fill out the blanks. Even if you are a friend, this will be the place I send out all the information you need to know about classes.
On Tuesday, I'll manually add some of you who had asked to sign up to know more about Donna Maligno's and my classes while at the Cupboard. - And YES!, I'll up date the newsletter to include Donna's classes as well!!
Friday, September 30, 2011
Progressing
I'm progressing on my studio. I've got a lot of stuff in the eBay pile and some things in the living room still but I'm making progress.


Organization is the key!
Today is cleaning day. I'm going to sort and get most of this organized so I can work.
Here's my room right now.


Here's my room right now.
Wednesday, September 28, 2011
Website being updated
If you are looking for www.kimparkinson.com it's currently being updated. I decided to add some features (calendar, guest book, etc.) so it needed to be converted.
You should be able to see the improved site tomorrow.
You should be able to see the improved site tomorrow.
Tuesday, September 27, 2011
All About Halloween class starts today!
I have teamed up with Bethany Kartchner and Jennifer Priest and we are bringing you some fantastic projects in a brand new class called All About Halloween!
Anyone can take this class, it's online at My Creative Classroom. Class starts today but you can work at it at your own pace. We'll take sign ups through October 7th. Here's a little about the class:

The first lesson will open in a few hours. Here is a close up of the cards and gift bags we'll be making:

Anyone can take this class, it's online at My Creative Classroom. Class starts today but you can work at it at your own pace. We'll take sign ups through October 7th. Here's a little about the class:

Trick or Treat! Do you love spooky ghosts? Goody bags filled with candy corn? Funny spiders and spectacularly scary mini-albums and layouts?
If so, All About Halloween is for you! In this jam-packed course, taught by three amazing teachers: Kim Parkinson, Bethany Kartchner and Jennifer Priest, we'll be creating everything you need this spooky season from cute Halloween cards and goody bags to whimsical home decor to fun layouts and mini-albums to document all the precious memories. If you need inspiration this season, look no further. You are in for an entire bag of treats! No tricks!
· Week One with Kim Parkinson: Fabulous gift bags and cards using alcohol inks, distress inks and embossed metal. We'll explore ways to highlight certain areas of a design using watercolor effects with UTEE.
· Week Two with Kim Parkinson: Create a spooky coffin mini book made from cardstock. It even has an easy stitched pamphlet inside! We'll discuss embossing on metal or pliable aluminum. If you do not have access to embossable metals, no worries! Kim will give suggestions on using other household items for embossing.
· Week Three with Bethany Kartchner: BOO! This week is all about spooky ghosts. You'll meet Zeke, Spooky and a whole gaggle of adorable ghosties. We'll create not just one, but three different home decor projects based on these transparent haunts using Creative Paperclay and supplies found at your local craft store.
· Week Four with Bethany Kartchner: Silly spiders are all the rage as we further explore sculpting with Creative Paperclay. Four unique projects involving our eight-legged friends are on the docket including a Halloween wreath with a spider named Jimmy, napkin holders and Miss Samantha, the most fashionable spider in the whole arachnid kingdom. Eeek!
· Week Five with Jennifer Priest: We'll explore innovative ways to create spooky effects on three unique scrapbook pages using googly eyes, paint, ink, and more. We'll also experiment with color and quirky embellishments for a mix of "scary" pages and whimsical, child-focused pages.
· Week Six with Jennifer Priest: Memory preserving continues as Jennifer shares several versions of mini-albums to lock up all of your spooky memories using leftover decorations to create up-cycled embellishments. To top it all off, we'll create custom "spooky" woven ribbon binding using the Bind It All machine.
If you are a new scrapbooker or crafter, don't worry! We will be covering all the basics along with more advanced techniques in video demonstrations, narrated presentations, downloadable pdf tutorials, forums and a student gallery. If you aren't sure about how you'll view course materials, please read our FAQs.
The first lesson will open in a few hours. Here is a close up of the cards and gift bags we'll be making:

I hope to 'see' you in the classroom!
Sunday, September 25, 2011
Art Bar is here...
It's taken a lot of manuevering and lots of help from Bev, hubby and my Father but I've got the Art bar in my house! Not all the stools are here and it's no where near ready for classes but it's here! I thought some of you might like to see my before and after and what the bar looks like now...

After some clean up yesterday, it was looking clean but still like I had a ton of work to do...


Nice and clean looking! A white-wash of paint and it'll work out beautifully!
So, here it is... the Art Bar has made it to the house.

Now to sort and clean and get all the stuff around the room, into the bar... I'm in for a busy week...

This is before I even touched my room. You can see, there's stuff everywhere. I know the photo is tight but it gives you a general idea of what I'm working with.
After some clean up yesterday, it was looking clean but still like I had a ton of work to do...

OK, OK. I confess. It was really only this little area that was cleaned up. The colorful cart went to my son's room so that he could use it for legos.
I have two tables in my room but this is the one I usually 'worked' on. (when I could find it...)

Yah, I know. It's hard to see. It's been covered in stuff like that for probably 6 months or better.
I took to top off of it, and repurposed the cabinet part. Now the cabinet is in my kitchen where a bakers rack used to be. The baker's rack was nice but it always left everything out in the open, for all to see. Now everything is neatly contained in the cabinet. All I need now is a small shelf above it to hang some utensils.

Nice and clean looking! A white-wash of paint and it'll work out beautifully!
So, here it is... the Art Bar has made it to the house.

Now to sort and clean and get all the stuff around the room, into the bar... I'm in for a busy week...
Friday, September 23, 2011
Life...
Things have changed a lot since my last post. These past few Summer months haven't been all rosey for me. Sure, I've had some great times but life's thrown me a few curve balls this Summer. Without going into too much detail, I've had some personal issues, health concerns and some career setbacks. Let me catch you up on where my career is heading...
First, let me say that I STILL have a job with My Creative Classroom. Not only do I teach classes online there but I'm also their Marketing person. It's a great place to learn and a great place to work (even better since I do it all from my home!!)
But as far as in person teaching goes...
I'm on my own. Basically. The Scrapbook Cupboard will be closing it's doors forever on September 30th (if not before). I've already taught my last class there. I've been with Bev and the Scrapbook Cupboard for 7 years. It's like loosing a ton of friends all at once. I know that many will follow me and many will keep in touch but it's not the same as seeing them at the Cupboard. This is a sad chapter for me, like missing a piece of me.
I started at the Cupboard teaching a Circle Journal class. That didn't actually run for a few years after it was introduced. My running class was a sketch series that we called "Map it Out". I had three 'regular' students. Melissa, Stacy and Susan. They stuck with me for maybe a year or so. In that year, I tried other classes but not many ran or if they did, they had small attendance. That was when the Scrapbook Cupboard was all about Scrapbooking.
About 2 years after I started, we started to move into mixed media, stamping, cardmaking and other paper crafts. That's where I really fell in love. I liked scrapbooking but I LOVED getting dirty with paints, inks and all those other goodies. From then on, I went on to aquire my certifications. Ranger's Inks, Silhouette, Ten Seconds Studio, Copic 1, Copic Intermediate and even some silly ones like the Tombow one I got at CHA this past Summer. (it wasn't really a certification as it was a class on it). Why so many certifications? To better myself so I could teach my students new ways to use their supplies. And I love teaching. I really do. I think I've got a natural ability to help others and I'm creative enough to come up with a project I'm confident enough to teach. All important traits to being a better teacher.
I've even been on some design teams, like Kandi and Dreamweaver. Both of which, I'm sad to say, I didn't put in as much as I should have. Designing for the sake of designing isn't for me. I design with ONE goal in mind... to teach it. And really, I've always had the store and it's stuff to deal with.
So, you might be thinking, "What about another store?" I have decided NOT to tie myself to any one store. I was going to. I was all set to start moving my classes over to one store but (thankfully) I found out that wasn't going to work. And now, this frees me up to be able to work in other stores and venues. I've already got some of that in the works!
For now, I've made arrangements for my ATC club to meet at a local community center. These will occur once a month and we'll enjoy each other's company and create some beautiful art to share.
As for some of my other classes, well... I bought a large bar-like table that I can teach off of right here at my house. I'll continue some of my classes here and use the community center for the larger classes. I started my own website... www.kimparkinson.com that I'm going to showcase class dates, times, prices and photos. You'll be able to view the class, chose one and pay for it all online when it's finally implemented. Very cool and very easy! I'll be working on that within the next week and hope to have it all up and ready soon with classes started after October 16th.
I need to be better with my blog now, so you can expect more frequent updates. At least several times a week. I'm ready for the challenge and I hope you are all ready for me too!
Thursday, May 26, 2011
Back from vacation!
Last week at this time, I was here:

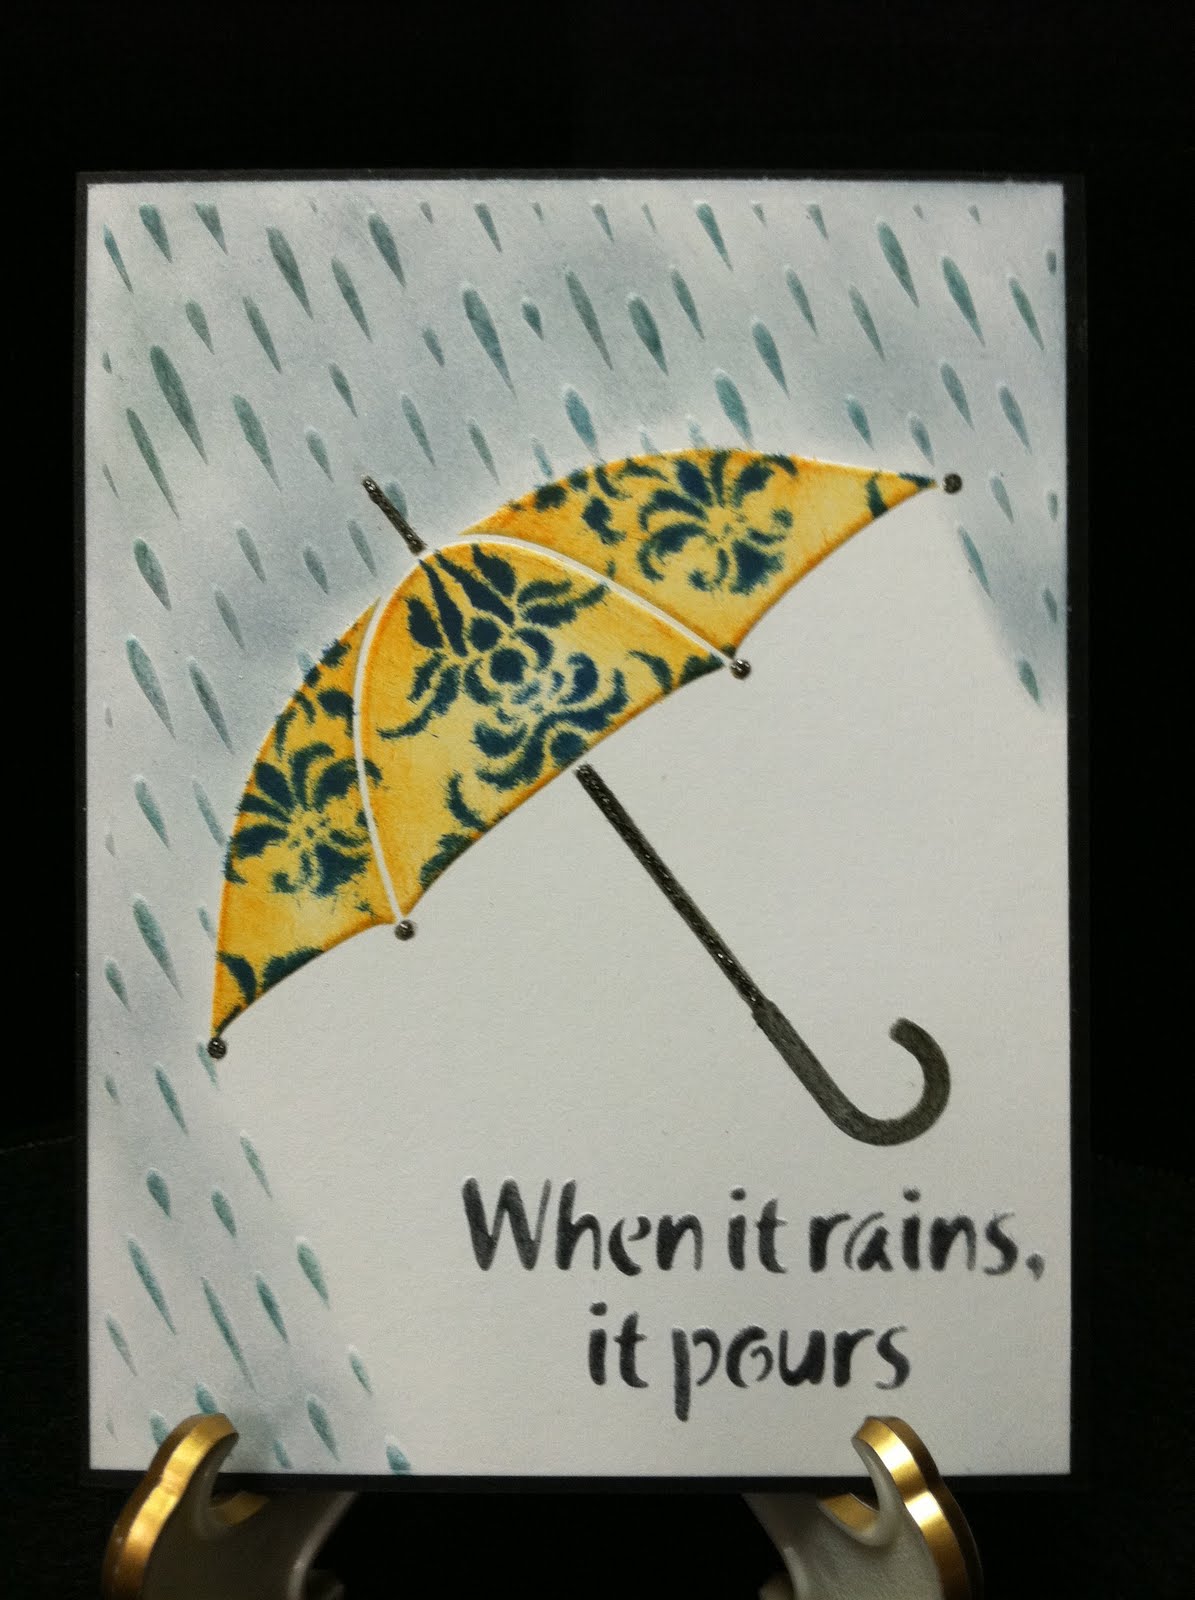
Thoroughly enjoying my first family vacation out of New England. Evidently while I was away, Boston needed umbrellas the entire week.
So for Dreamweaver's blog post, since Lynell did some umbrella's, I thought I would show you some too...

 Today it is gorgeous out. Let's hope it stays that way for our Memorial Day weekend and we don't need any real umbrellas any longer!

Thoroughly enjoying my first family vacation out of New England. Evidently while I was away, Boston needed umbrellas the entire week.
So for Dreamweaver's blog post, since Lynell did some umbrella's, I thought I would show you some too...

Thursday, May 5, 2011
Creating fast and furiously!
It's been a whirlwind here since my last post. Right before Easter, I came down with Strep throat. Unfortunately regular medication didn't touch it, so on Monday I went back to the doctor and had a different medication prescribed. This one, I 'could' be allergic to. It's a cousin of another med I am allergic to. Well, needless to say, I am. And so I've had to take the rest of my meds with a nice dose of Benedryl. Which knocks me right out! ZZZZZZZzzzzzzzz.
Once I woke from my stupor and felt better, I knew I needed to get into high gear! My online Advanced Stenciling class with My Creative Classroom opens next Monday! Yikes! I had barely started creating any of the videos, PDF handouts or Presentations!
I set myself to task this week and just a few moments ago finished up the last presentation for the third week of class. I'm what you might call a last-minute-Nelly and sometimes, I'm putting the finishing touches on these things the night before the class opens. But! I have made an improvement. The first week of class isn't until next Monday and all is completed! Now to wait until Monday! Here are a few screen shots from my class...


There's always lots of information in my classes and the best part is, you'll have step by step hand outs for each of the techniques!
Now that I have that class off my plate, I'm on to some in person classes I need to worry about. Those will be tackled tomorrow and Friday. My plan is to have all my classes, directions and everything work related DONE by Monday. See, next Thursday we are headed out for an 8 day vacation to DISNEY!!! Yup! I cannot wait. This will be out first major family vacation ever! The last family vacation was to Maine (only a few hours away!) and the last vacation hubby and I went to that didn't require driving was a cruise to Bermuda 8 years ago! So, we are long overdue. This is going to be a fabulous trip. My Brother, his family and a family friend and his family are all going down too. Not the same dates but we will share some time together there. We're even going to celebrate my youngests 8th birthday there! I'm too excited. BUT! First, I must finish my work....
Thursday, April 21, 2011
Another Sketch Thursday!
Spring is finally arriving here in Massachusetts! I'm so happy to see daffodils and tulips starting to bloom. The days have been getting warmer, I've even been able to open my moon roof once!
This Sunday is Easter and today is Sketch Thursday over at the Dreamweaver design team. So, I thought I'd combine the two.
Here's the sketch for the month, created by Lee...
 I created the torn layers on just a piece of paper using some of the new Papersoft from Viva Decor.
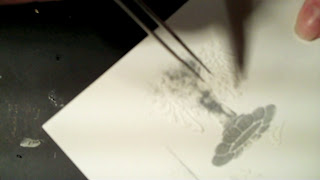
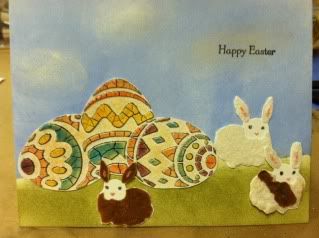 I've been working on this card a little bit at a time for a little while. The little bunnies are pasted, glued and then flocked! I also added some pink and grey stickles for their little bunny ears, nose and eyes.
The 'Spring Spheres' (Easter Eggs!) are pasted in black, then pasted over with the crackle paste. I then placed the stencil back on top of the design and colored it with some inks. The eggs were kinda stark white, so I colored them with some Apricot Papersoft and then used a little bit of embossing powder over all of it to give it a slightly glossy look (like and egg!). Cut everything out and mount on your card background!
A couple of friends asked about the double flocked bunny. I covered most of the bunny in white and then once dry, added glue and brown flock in just the area I wanted the stripe. A small amount of brown is on other areas of the bunny but if you allow the white to dry fully and you don't get glue anywhere else, you should do a pretty good job of coloring the bunny two toned.
Have fun with your stencils and have a Happy Easter!
This Sunday is Easter and today is Sketch Thursday over at the Dreamweaver design team. So, I thought I'd combine the two.
Here's the sketch for the month, created by Lee...

The 'Spring Spheres' (Easter Eggs!) are pasted in black, then pasted over with the crackle paste. I then placed the stencil back on top of the design and colored it with some inks. The eggs were kinda stark white, so I colored them with some Apricot Papersoft and then used a little bit of embossing powder over all of it to give it a slightly glossy look (like and egg!). Cut everything out and mount on your card background!
A couple of friends asked about the double flocked bunny. I covered most of the bunny in white and then once dry, added glue and brown flock in just the area I wanted the stripe. A small amount of brown is on other areas of the bunny but if you allow the white to dry fully and you don't get glue anywhere else, you should do a pretty good job of coloring the bunny two toned.
Have fun with your stencils and have a Happy Easter!
Thursday, April 7, 2011
To my husband...
On Tuesday, April 5, Patrick and I celebrated our 14 year wedding anniversary! I'm so happy to be married to this man. He's my best friend, my love and my everything. We are extremely fortunate and have a beautiful home, two great boys and each other. We've worked through some bad times but mostly we have a lot of good times! Whether raking the yard or watching a movie, pinching pennies or living it up, living through sickness or living healthfully, we have worked through it and each year we get closer.
Today, this card goes out to my loving husband.... Thank you! For everything!

Today, this card goes out to my loving husband.... Thank you! For everything!
Monday, April 4, 2011
Art Journals, Hand Bound classroom open!
My latest online class is all about Book Binding! We are making two hand bound journals in class over the next 4 weeks! Complete with all sorts of great techniques for your inside pages too!
If you've ever thought about making your our journals, check out my class at My Creative Classroom. Enrollment continues through April 8th and class is only $20!

If you've ever thought about making your our journals, check out my class at My Creative Classroom. Enrollment continues through April 8th and class is only $20!

These Art Journals will be treasured for years to come. This class is jam-packed with loads of techniques! We'll explore paints, chalks, inks and mists. We'll decorate each page in the books as well as create the covers and then finish them with a hand sewn binding. They can be created with Metal coverings or without.
This class will run for 4 weeks and each week we'll cover several techniques. By the end of class, you'll have created two journals perfect for keeping your art thoughts, or for scrapbooks or just to enjoy!
Thursday, March 24, 2011
Sketch Thursday!!
It's Thursday so another day to play over on the Dreamweaver Design Team! This week we are working with a sketch! This is the sketch:
 And here's my Springy take on the sketch:
 That's the trio tulip stencil number LL 444 in the middle. I first placed down the stencil and used some inks to color in the areas. I did have to use the picasso a bit at the top near the actual flower part. Then I took off my stencil, cleaned it and replaced it exactly back where it was. I then used Dreamweaver's Translucent paste over the image and let it dry. While it was drying, I dug out some Springy butterfly and pink paper, orange ink and orange stickles and created the card. It does open in the middle with the tulips and then inside says, "Happy Spring!"
Once the Tulips were dry, I sponged on some blue and green coloring so that it appeared they were grounded and adhered it to the card. For some added effect, I also used some of the blue and green on the pink cardstock as well.
This stencil works perfectly for this type of card but it also is the perfect stencil to use for a nice, bright Spring-time card! And for us here in Boston, who just got another dusting of snow today.... I'm yearning for my tulips to make their appearance in my yard!
Tuesday, March 22, 2011
Wanna play?
This Thursday is sketch Thursday with the Dreamweaver Dream Team. If you are interested in playing along... here's the sketch we will be using....
I'll post Thursday and you can see what I did!
If you wanna play and have a blog, you'll be able to put a link to your blog on the Dreamweaver Blog too!
If you wanna play and have a blog, you'll be able to put a link to your blog on the Dreamweaver Blog too!
Thursday, March 17, 2011
Happy Saint Patrick's Day!
Happy Saint Patrick's Day to all! Whether you've got a lot of Irish in you or none at all, it's still a day to celebrate with a pint of Guinness and to wear some green!
My family (on both sides) comes from New England, generations back we've been here. One side was here when the Mayflower arrived and the other arrived on the Mayflower, with other branches sprinkled in as well. I have a miniscule amount of Irish in me. So little in fact it amounts to... well, actually, none. Yes, for a girl born and bred South of Boston, the chance that we have little to no Irish is amazing, considering the Irish population around here. Even my husband has little Irish in him.
BUT!
His NAME is Patrick! And I count on him to rid my little island (my 1/3 acre of land) of all the garter snakes he (or I) can find! Couple that with the fact that March 17th is his 1/2 birthday, well.... I guess we'll celebrate!!! YAH!!
This week the Dreamweaver Design Team has a free week. No theme, no colors, no sketch, just do what we will and what we want! So, of course, I chose.... Some Saint Patty's day cheer!

I used several stencils for this design. First the background is done with the new large plaid making stencil. One way, it's colored in gold ink and the other is in green ink. I also did a little bit of gold Dreamweaver paste and then a little bit of the green Dreamweaver paste for the center portion of the plaid design. **NOTE: The colors in real life look very similar. The colors in this picture look way off. Sorry.** This technique takes some time to do as you need the first layer (in my case, gold) to dry completely before you can turn your stencil and paste the other side (green). Today wasn't a great day for that as it's been raining all day. But once I turned on the stove for dinner, I placed the large pasted piece on the stove and it dried before dinner was done! (I did NOT put this on the burner!)
While that was drying; I used the stencil LL381, a celtic knot with the Green Dreamweaver Paste.
Oh, and a little note about the paste. When you open the jar... it looks like a light green color. This is not the final color. Once dried, it deepens in shade and ends up being quite a different color then you see in the jar.
Before the paste was dry completely on the celtic knot, I sprinkled just a little bit of clear glitter on to the drying paste. It's stuck in there now and adds a nice sparkle to the card. I used the Gold Dreamweaver Paste on the Celtic Heart knot, LM178 and let that dry. Using some scissors and an exacto knife to cut out the open areas I then adhered it onto the celtic knot. Pop that up entirely, add a little typed sentiment of "Happy Saint Patrick's Day!" and I'm good to go!
I hope you enjoy and I hope you enjoy something green today!
Thursday, March 10, 2011
15 minute card...
Today's Blog Challenge with Dreamweaver is a color challenge! Actually, it's my colors that are chosen today. I chose the colors Brown, Cream and Blue.
I have a usual routine every week but this week, I'm all outta sorts. I had been away for the weekend and hubby usually has Thursday's off and this week he doesn't so when I woke this AM, I thought it was Wednesday. Oops. So, I thought... well, I'll make this a bigger challenge for myself. I'll make a card using my colors in just 15 minutes. I grabbed some cream cardstock, some blue cardstock, and some brown with blue patterned cardstock. I grabbed my stencils and looked. My lightbox is on my table since I'm using it for some other projects and I went to work looking for a design I could complete in only 15 minutes.
 I dry embossed the running horse (LM 167) and then added some brown ink to his mane and tale, swirling some of the ink over the body of the horse too. I used Cocoa F/X powder on his mane and tail and then cut him out. Honestly, cutting him out took the longest part of my 15 minutes! I tore the patterned papers to look like a scenery, added some stamped words and adhered everything down.
An easy card, finished in 15 minutes and now, let's hope I can remember it's Thursday!
I have a usual routine every week but this week, I'm all outta sorts. I had been away for the weekend and hubby usually has Thursday's off and this week he doesn't so when I woke this AM, I thought it was Wednesday. Oops. So, I thought... well, I'll make this a bigger challenge for myself. I'll make a card using my colors in just 15 minutes. I grabbed some cream cardstock, some blue cardstock, and some brown with blue patterned cardstock. I grabbed my stencils and looked. My lightbox is on my table since I'm using it for some other projects and I went to work looking for a design I could complete in only 15 minutes.

An easy card, finished in 15 minutes and now, let's hope I can remember it's Thursday!
Saturday, March 5, 2011
Happy National Craft Month!

March is National Craft Month! And we are celebrating over at My Creative Classroom! Interested in taking a class this Spring? Well, now's a great time to sign up and take any class at My Creative Classroom. Sign up for a class and receive one class free (you can choose from 4 different classes)! WOW! Here's a sampling of the different FREE classes offered....
Would you like to know more information?
The Basics of the Program:
Here is how the program will work.
•Purchase 1-3 classes in March and you get a one free seat. You get to choose the class from a list of 4 possible classes.
•Purchase 4-6 classes in March and you get two free seats. You get to choose the classes from a list of 4 possible classes.
•Purchase 7-9 classes in March and you get three free seats. You get to choose the classes from a list of 4 possible classes.
•Purchase 10+ classes in March and we will automatically enroll you into all four classes.
More details can be found here. MCC
I hope to see you in the classroom!
Thursday, March 3, 2011
Metal and Dreamweaver!
A few weeks ago, Lynell posted a picture of a card Magdelena Muldoon did. Magdalena owns MercArt. MercArt provides metal embossing tools and metals. I have a lot of MercArt's tools in my house, they are very fine quality and work great. I started my metal embossing 5 years ago with Ten Seconds Studio and discovered MercArt about 3 years ago. I am certified to teach Ten Seconds Studio metal but I like both companies. Heck, I've even told people to use an empty ball point pen and a mousepad to emboss their metal! With what ever tools you use to start metal embossing, you need to try this technique! There's ONE tool above all else that you absolutely need to purchase when working with embossable metals....

 Then I went on to do another card....


This is a Paper Stump or a Paper Thumb. Some people call it other names too. They come in a variety of sizes. My favorite is size #8. It's easy to hold and works well for most tight spots. But I do own a bunch of the other sizes too. If you own a paper stump (they are also used by charcoal artists for blending), a mousepad and an empty ball point pen... you can metal emboss! Of course, it's nice to have all the tools and the work is much easier with all the tools but if you aren't sure if you are going to like it, this is an easy, fast and inexpensive way to get started! Oh and you'll need some metal. :-)
So, I decided to try my hand at the exact same design that Magdelena did:
And this one is on clear acetate and has a nifty technique on the back! Fill the embossed area with spackle, let dry and then use alcohol inks right over the whole thing! You'll color your metal AND the spackle, leaving you with this...
Pretty neat, huh? The spackle is more of a burgandy in person so the effect is stunning. And a surprise when you open the card!
I hope you enjoy!
Thursday, February 24, 2011
Hoot Hoot, sketch challenge time!
It's Dreamweaver Thursday and I have a fantastic sample for you!.. This week we were supposed to use the following sketch created by Terrece:

Here is my version of the sketch. Done with the new LL 3013 Owl Pair stencil and some Faux Cloisonne!


Here is my version of the sketch. Done with the new LL 3013 Owl Pair stencil and some Faux Cloisonne!

We received in these new dry paints at the store, InkaGold by Viva. They are really rich and highly pigmented colors. They all have a shimmer to them too. So I used those to color in my stencil area first and color the owls. Then I let dry. Once dry, I rewet to add embossing powder and create the faux cloisonne look! The neat thing about the Viva inks, when heat, they bubble up into the embossing powder and create a really neat look!
I hope you are inspired to use this sketch and perhaps try your hand at some faux cloisonne!
Subscribe to:
Posts (Atom)
-
 Welcome back! This week, Dreamweaver is having a color challenge. The colors that were chosen... Pink and Brown!! I LOVE those colors. ...
 -
 Happy Valentine's Day!!! I was going to do a little mini Card but decided that maybe now is the right time to offer something special ! ...
 -
 I'm usually much better at posting. Only twice in 2 weeks isn't my style. I've been busy here but it's mostly family stuff t...