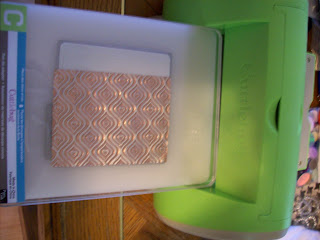
To make it up to you, I've decided to give you a tutorial. I have a class next Friday night at the Scrapbook Cupboard. It's 8 new and exciting techniques using metal. Here's a sneak of one of the techniques. If you are interested in some more, give the store a call to sign up!
What do you need for this technique?
- An Acrylic Mat Set
- Paper Stump
- Small Round Eraser
- Large Mold
- Art Metal Copper
- Sanding Block
- Quickutz Die
- Revolution Tool (although I used the Cuttlebug)
 For the first step, put down the acrylic mat, then the thin mat, put down the large mold and then the art metal on top of that. Use the paper stump to rub the metal until you've come out with the design. Really get in there with the paper stump. If you need to, go back over it with the small round eraser...


Remove the mold and then take the sanding block to the metal. Make sure you hold the sanding block horizontally to the metal so you just sand off the top color of the metal. The copper remains in the 'cracks' but the aluminum shows through on the top. Pretty cool, huh?


Once you've completed the basic steps, put your piece of metal on your die and run through your die cut machine. I used a Quickutz border die but I used my Cuttlebug. I did have to run it through the machine twice but then I realized I didn't have a shim on the die and think that might be why I had to. Try it out. Test your dies. You may have to run it through twice or you may just need a shim. Either way, this will work with anything that will cut through paper. The metal is actually easier to cut through sometimes, it's pretty thin.


When you're done, you'll have beautiful metal die cuts perfect for cards, scrapbook pages, alterable items or anything else you'd like. I hope you enjoy!
 And again, if you're interested in learning more. Call the store to sign up. Here's a look at the others...


2 comments:
Very cool Kim! Looking forward to more.
I'm glad you liked it Susan! I just put on the schedule last night a technique class for Sunday, October 19th. I know you can't make Friday nights. It's all metal techniques!!
Post a Comment