Welcome to the first ever Dreamweaver Stencils Dream Team Blog Hop! Today is day one of this three day long blog hop. There's lots to view over this weekend, a whole lot of eye candy using these quality metal stencils from Dreamweaver Stencils! Follow along, post a comment and you could be a winner! (details on blog hop are at the bottom of this post.) Be sure to comment on this post for a chance to win!
All the gals on the Dream Team were given four stencils to work with for the blog hop. These were mine:
Well now I'm hoping you are wondering what I did with them. I used the lace border in a few different ways and coupled that with the the Village and with Let's Boogie. First up, a little Halloween fun!
One of the coolest parts of this card is that it GLOWS in the DARK! Well, the ghost, "Boo" and the little corner semi circles do anyhow! Wanna know how I created it?
First I pasted on the ghost with Pearlescent Paste. He's part of Let's Boogie and needed to be masked so that all I used on that stencil was the cute ghost. I also masked off parts of Boogie and pasted the word Boo at the bottom of the card. I then made sure the ghost and the word was dry completely.
After the ghost was dry, I fit on the Lace Border Stencil and used the original matte embossing paste. Let that dry and then used the
Picasso stencil to add color to the candy corns, dots and swirls. In the lace border, there are these 6 pie pieces that make a circle, I left those white. Well, I added googly eyes but not until after the entire thing was done!
Now, I own this glow in the dark embossing powder and thought it would be a cute touch to add that to the ghost. Glow in the dark embossing powder works best over a light surface and the ghost was perfect for that! I re-fit my ghost stencil back in place, used embossing ink and then sprinkled on some of the embossing powder. I heat it slightly just until melted. After doing that, this adorable little ghost now glows in the dark!
After the card was completely stenciled and pasted, I added the googly eyes last.
I was able to create something fun and then something elegant out of the same Lace Border stencil. These stencils are truly versatile! Use as much or as little of the stencil as you'd like to get the best results for your card or project!
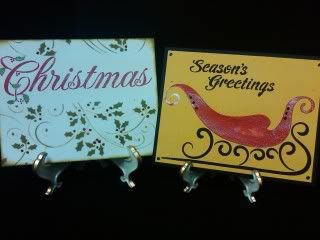
My next card is for the Holidays.
This needed some masking as well. I masked off one of the houses from the Village and then I used my Pearlescent paste to paste onto a heavy weight vellum paper. Once the house was dry, I dug out my Pergamano kit and got to work! I placed the Lace Border stencil strategically so the house fit in the middle and then either pushed the vellum into the stencil, pushed it out of the stencil or I used the pokey tool to poke holes into the vellum. With the right tools and the right paper, this can easily be completely in about 45 minutes - and that allows drying time for the paste in a humid climate (I live in New England).
Mount the vellum onto a bright blue piece of paper and adorn the card as you'd like. Easy! Elegant! And just shows another option of versatility of these stencils.
My last card today is with the stocking.
More of a vintage type card. I used pasted the stencil on red paper. Again I used Pearlescent - hmmm.... I didn't realize until writing this that I used Pearlescent on everything. With 15 different knds of pastes, my options are NOT limited so I guess I'm going to have to hide the Pearlescent so I stay away for the next few projects!
After the stocking was dry, I cut out right on the lines (or where the natural contour of the lines would be). I placed the stencil back on, grabbed some glue and a paint brush and painted the glue onto the top part of the stocking. I then threw on some flocking. WHAT? Flock on your stencil paste? Yup! Absolutely, these products are amazing!
I distress the background of the paper, added soem ribbon and old saying I had lying around and the stocking. Viola - done!
But I'm not going to stop there! I'm going to tell you about some classes I'm teaching in person and online! If you want to know more about the amazing versatility of these stencils, you can come on by the Scrapbook Cupboard and take a class from me in person. My next Dreamweaver Stencil class is on Friday, October 22nd. We'll be creating two cards using several neat techniques...
What? You don't live in New England? Well, many of the other Dream Team members teach in their areas. Or you can take my online class!
Class just started yesterday and will run for 4 weeks with new lessons posted every week. You can view the class information here at
My Creative Classroom. If you love all those beautiful metal stencil designs out there, you'll love the look of what they can do! Stenciling with Style will walk you through using DreamWeaver's Metal stencils, their pastes, F/X powders and the many different techniques to do with them! This class will is technique based so you will not need to have the same stencils as the instructor but you will be able to complete projects based on the stencils you do have! Class includes video presentations on exactly how to get pasting right every time as well as materials and instructions on basic pasting, dry embossing, theorem stenciling, using the 'picasso' stencil, working with other mediums such as Copic markers, inks and Art Stix, pasting on different mediums, coloring the pastes, adding texture to pastes, sludge pasting and much more! Class starts on Thursday, September 30th with new material posted every Thursday for 4 weeks. Class cost is $25.
So now more information about the Blog Hop!
BLOG HOP INFO
We want you to have the chance to win YOUR favorite stencil, embossing paste and Metallic F/X color... for each time you post along the hop, you need to leave a comment on the site where the newest creation is offered, then go to the Dreamweaver site here
http://www.dreamweaverstencils.com/, choose the stencil you like best, identify it to us, tell us why it's your favorite, and how you think you'd use it. Just be sure you comment on each blog along the hop..make sure your comments count for winning! Information today...then October 1st you hop!
BLOG CANDY... HOW TO GET IT!
For each time you comment on different blogs, you need to choose a different stencil as a favorite, your favorite paste and your favorite Metallic F/X color...just in case you win more than once! At the end of the three days,each member of the Dream Team will choose a random entry to win and post it on their site by midnight of the next day October 4.
ANOTHER OPPORTUNITY FOR CANDY
Hoppers are encouraged to comment once on each designer's blog throughout the blog hop. Each time you do so will give you one opportunity to win what's on offer at that blog. For an additional entry, you're invited to sign up to be followers of the Dream it Up Blog, right here. So, with eleven designers, this gives you the potential of twenty-two chances to win! All winners will be selected by Random.org, and posted on each designer's blog by midnight Monday.
BLOG HOP SCHEDULE
It is not imperative to follow this schedule, but different designers will be posting their creations on different days, so take one last look on Sunday to make sure you've taken advantage for all the opportunities to win blog candy ...now enjoy these designer's "treats", and here is their schedule:
OCT 1ST
OCT 2ND
OCT 3RD
Have fun hopping!