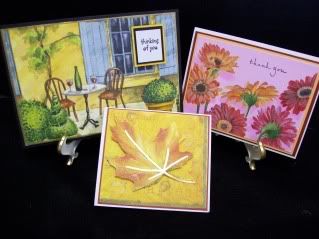
Sunday, September 27, 2009

It's Metal Sampler time!

I've been feverishly typing up instructions for Monday's Metal Sampler at My Creative Classroom.  I'm going to be teaching this in person Sunday at the Scrapbook Cupboard too!  So if you aren't busy today, you could join me in learning how to create this:


Let me tell you, it's very different to teach in person than it is to teach online.  Yes, the project might be the same but for online you have a lot more typing, loading of photos and slideshows to put together.  eyeyiyi!

Why am I cramming to do it at the 11th hour?  Because...  I'm the Queen of Procrastination!  And I just love to torture myself with last minute deadlines and issues. 

Anyway...

Thankfully all the PDF files are done.  And they are loaded to the website!  So, if you didn't get the latest newsletter from My Creative Classroom showcasing my class, then let me tell you - there's still time to go there and sign up! 

Not sure?  Let me show you a few pictures that are in the tutorials...  and there are many, many more.


In these classes you just won't learn about the paper stump and the fine tipped tools.  We'll also explain what the angle tool, the deer foot tool and the chisel tool are all used for.  We'll cover techniques that I've created as well as those that I learned at the Ten Seconds Studio Certification course I took in April, 2008.  There will be more than 15 hand outs on metal embossing alone!  What an amazing deal!.  Whether you are in class tomorrow or in the online class Monday, I'm looking forward to helping you make your journey into metal embossing even more fun.

Wednesday, September 23, 2009

Better late....

then never, right?!!

I finally finsihed my "Napkin Cards" for this Friday's class at the Scrapbook Cupboard.  These are super easy and fun to do!  And once you know how, you'll be able to use any decorative napkin you own!!!!  Think of how easy a birthday card could be - or to make your Holiday cards with this this fun technique!


This class is definitely running, there were sign ups even without samples - you guys are all great!  But if you aren't signed up and would like to take the card class, call the store at 508-378-0008.  Once you learn this technique, you'll be able to use it on much more than cards!  Think of it - scrapbook paper made with a napkin!  Yup, it can be done!  h,mmmmmm.....  maybe that might be something I can work on...

Tuesday, September 22, 2009

Be on the look out...

I made these beauties for my friend Bernadette....


Bernadette had a birthday yesterday and when I asked her what she wanted for her birthday she said she wanted something handmade.  WHAT???  Yah I could do it but I'm weeks behind in my work right now as it is, I didn't know if I'd have time to make her a scrapbook or a bunch of cards or anything else.  She then also mentioned that she was loving the Tattered Angels Glimmer Mists and that they were so darn expensive.  I told her not to bother, I could make her some!    So not only did I get her a gift but it's homemade!!  Yah for me.

These are the three colors I chose and I precisely measured and weighed everything so I can make these colors again!  I even named them... Winter Blue, Spring Sky and Autumn Rain. 

I think I may make more of these.  I'll have to figure out pricing but it's definitely something I could sell.  But for now, it looks like these may become Christmas presents and birthday presents for friends.  I've even named them... Kim's Shimmery Concoctions.  OK, well I might work on the name but for now, Bernadette is the only one with these prototypes.  Lucky girl!

Let me know if you'd be interested in one.

Friday, September 11, 2009

Loosing....

My friends, Susan, Traci and I are all on Weight Watchers.  Today was Susan and my first weigh in.  Just for those people interested in knowing how well I'm doing each week, I started a new blog just for this.  Here's the link:  http://kimsweightlosszone.blogspot.com/

I'll put it on my side bar under favorites too, just in case anyone wants to know in the future.

Friday, September 4, 2009

Art Journals, Hand Bound!

I just added another classroom to my class list over at My Creative Classroom

Have you seen or heard about My Creative Classroom?  My Creative Classroom, or MCC for short is "a combination of [founder Jeri Parks] two passions: arts/crafts and education.  Jeri has put together a huge list of extremely talented teachers.  The Fall Semester is starting this month and we've got a little bit of everything on the site.  We've got Copic classes, Bind It All classes, Wreath Making Classes, Mixed Media classes, Cricut Classes, Rubber Stamping Classes, Scrapbooking classes (both paper and digital!) and a whole lot more! 

As a matter of fact, this is where you can find my Metal Sampler class and now my Art Journals, Hand Bound Class!


Registration is open for both of these classes.  The Metal Sampler starts Monday, September 28th and the Art Journals, Hand Bound starts Monday, October 19th.  I'd love to see you in the classroom!

Why take a class online?  Well if you can't come to class in person, this is a great way to learn something new!  Or if I'm not offering a class anymore in the area, here's an alternative! We've got a great philosophy over at MCC...

"My Creative Classroom is where teachers and students come together to create, to learn, to share and to grow."

I hope you take some time for yourself and join us.  Come learn something new this Fall!

Thursday, September 3, 2009

First Day of School

Yesterday was the first day of school for both Caleb and Bryce.  Both boys were excited (as was I!).  Caleb was up extra early and ready to go way before we had to be at the bus stop.

I got a few pictures of the kids at the bus stop.

Now that both the boys are in school, I should have plenty of time to create and get to work.  It's day two and I have created anything yet.  I've been too busy doing things that haven't been done in a while.  Maybe tomorrow I'll create something.  Let's hope!

Wednesday, September 2, 2009

Trail Blazer Card Directions...

I've created another card in order to give you step by step instructions to create this winning card...

First we'll start with the materials I used:
White Cardstock
CC Rubber Stamps Mountain Waterfall Template and tool
CC Rubber Stamps Reflection Stamp
Repeat Impressions flying mallard stamp
Paintbrush
Mini Sponges
Marker in a Dark Green - I used NE Ivy by CTMH
Staz On black ink
Distress Inks by Ranger in the following colors:
Spiced Marmalade
Mustard Seed
Broken China
Faded Jeans
Frayed Burlap
Other inks:
CTMH White Daisy
CTMH Topiary
Start by placing the cloud section of the stencil down on your white cardstock.  Use the large Sponge tool to rub both Broken China and Faded Jeans in an upward motion.  Move the Stencil over and continue until you get the righ amount of 'clouds'.
Flip the stencil over and use the "Mountain Side".  Rub the large Sponge tool off on a scrap piece of paper and then use Frayed Burlap and Topiary to add in some mountains. No need to make the mountains really dark, we'll darken them up a little later.  Continue the mountains across the page.  Also, make some mountains taller than others.
Using the Waterfall portion of the stencil, place it under the largest mountain (mine was the one on the left) and carefully rub on some more Frayed Burlap and Topiary.  There's no need to continue this across the page, we'll cover any imperfections later with the stamp.
See how light everything is.  No worries, we're going to go back over everything. 
Now take the Grass portion of the stencil (YES! All this is on the same stencil!) and start on the right and make it as high as the stencil will allow, move the stencil over to the left and make the grass smaller and smaller.
Now let's go back and darken things up.
Put the mountain portion of the stencil back over the area.  If you want a little bit of a shadow, you can move your stencil slightly too.  Use a small finger sponge to sponge on some Frayed Burlap.  It's darker and adds some depth and shadow to your project...
Rub the large sponge into the Broken China, Faded Jean and Night of Navy and rub over the area that will be the water.  Add some highlights with the same colors with a small sponge as well...
Soften some of the colors with a paint brush dipped in white pigment in.  This will add a little bit of a white foamy look at the bottom of the waterfall...
Clean up the top of the waterfall by putting the stencil back over the area and using the small sponge in some Frayed Burlap. 
Ink up your Reflection stamp in black Staz on and add to the right and a tiny bit to the left side of the card.  Add the landing mallard as well.  In Black Staz on.  I used New England Ivy to color in the mallard...
Add Spiced Marmalade with a small sponge.  Use a light touch.  Add this color just behind the mountains and in the valley's.  Also make sure you add a little to the water.  Use the paint brush to add some Mustard Seed to the scene.  Add some to the water, on top of the orange and pulling it out into the clouds.
After that, you're done!  I added the Quote in the photo with PhotoShop.  But you could just as easily print it on there with your home printer.   Here's the slight difference from the card I submitted and the card I created for the tutorial.  The one I created for the contest is on the bottom.
I hope you enjoyed the tutorial.  Thank you again for your votes! 

School's out ...for Summer?

Last night the Governor of Massachusetts cancelled all school until May 4th.  He did this on March 25th.  That is about 6 weeks of no sc...